One of the most common mistakes beginners make when retouching portraits is removing too much detail. Smooth skin may look attractive at first, but excessive retouching often creates an unrealistic plastic appearance. Professional retouching is not about eliminating texture—it’s about reducing distractions while preserving the natural character of the skin.
Topics
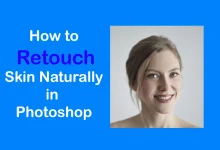
Looking for a complete portrait workflow? See our guide on How to Retouch Skin Naturally in Photoshop.

Why Skin Texture Matters
Natural skin contains pores, tiny wrinkles, and uneven details that make a portrait look believable. Removing every imperfection may produce a soft image, but it usually destroys realism. The goal of retouching is not perfect skin. The goal is healthy-looking skin with natural texture.
Start with Small Distractions
Instead of trying to smooth the entire face, begin by removing temporary imperfections such as pimples, dust spots, or scratches.
The Spot Healing Brush Tool works well for quick cleanup, while the Healing Brush Tool provides more control over texture sampling.


Avoid removing freckles, moles, and permanent features unless the subject specifically requests it.
Learn more about these tools in our Photoshop Healing Tools guide.
Work on a Separate Layer
Professional retouchers rarely edit directly on the background layer.
Create an empty layer and enable Sample All Layers. This workflow allows you to make corrections non-destructively and compare the result with the original image at any time.
Working this way also prevents accidental texture loss.

Need a closer look at the Healing Brush Tool? Read our complete guide to the Healing Brush Tool in Photoshop.
Zoom Out Frequently
Many texture problems become visible only after zooming out.
When working at 300% magnification, it is easy to focus too much on tiny imperfections. Zoom out occasionally and evaluate the entire portrait instead of individual pores. What looks imperfect at high magnification may appear completely natural at normal viewing size.

Retouching a Portrait Naturally
Imagine you are editing a headshot for LinkedIn or a business website.
First, remove temporary blemishes with the Spot Healing Brush Tool. Then use the Healing Brush Tool on larger areas where texture needs to be preserved. If necessary, reduce strong shadows with gentle Dodge and Burn adjustments rather than applying excessive blur.
This approach keeps the skin realistic while improving the overall appearance.
Avoid Overusing Blur Filters
Gaussian Blur and aggressive skin smoothing plugins often destroy fine details. While these techniques may create soft skin, they usually remove pores and produce an artificial result.
Subtle corrections almost always look better than heavy smoothing.
Explore more practical editing techniques in our Photo Editing Tutorials category.
Compare Before and After
Professional retouchers constantly compare the edited image with the original.
Turning layers on and off helps reveal whether too much texture has been removed. If the face begins to look flat or waxy, reduce the opacity of the correction layer and restore some detail.
Still deciding which healing tool to use? Read Difference Between Healing Tools in Photoshop to compare their strengths.
What You Should Remember
Natural retouching is not about creating flawless skin. It is about directing attention away from temporary distractions while preserving texture and personality. Small corrections, careful sampling, and patience often produce better results than aggressive smoothing techniques.
Sources
https://www.youtube.com/watch?v=PCwuA3njBa8