
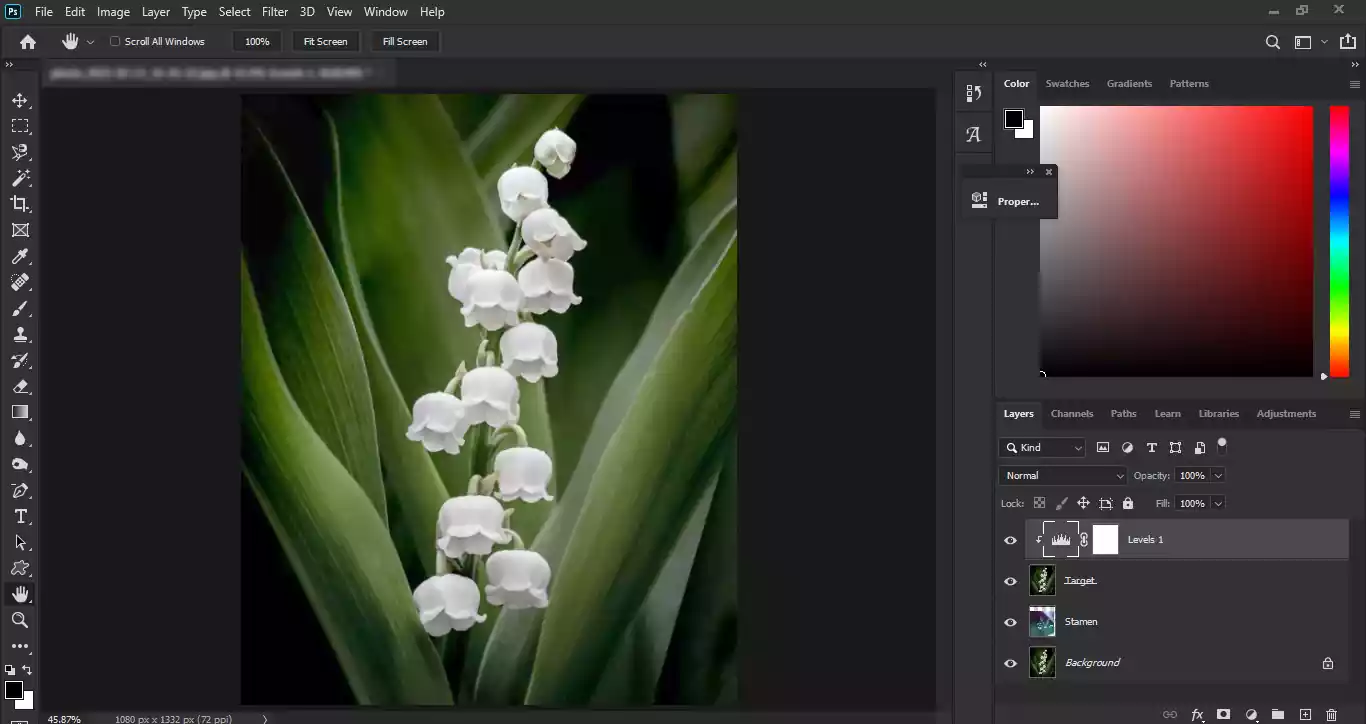
Levels is one of the most useful adjustment tools in Photoshop for correcting exposure and improving contrast. Whether an image looks too dark, too bright, or lacks tonal balance, Levels provides a quick way to restore a more natural appearance. In this tutorial, you’ll learn how to adjust Levels in Photoshop and understand what each slider does.
Where Can You Find the Levels Adjustment in Photoshop?
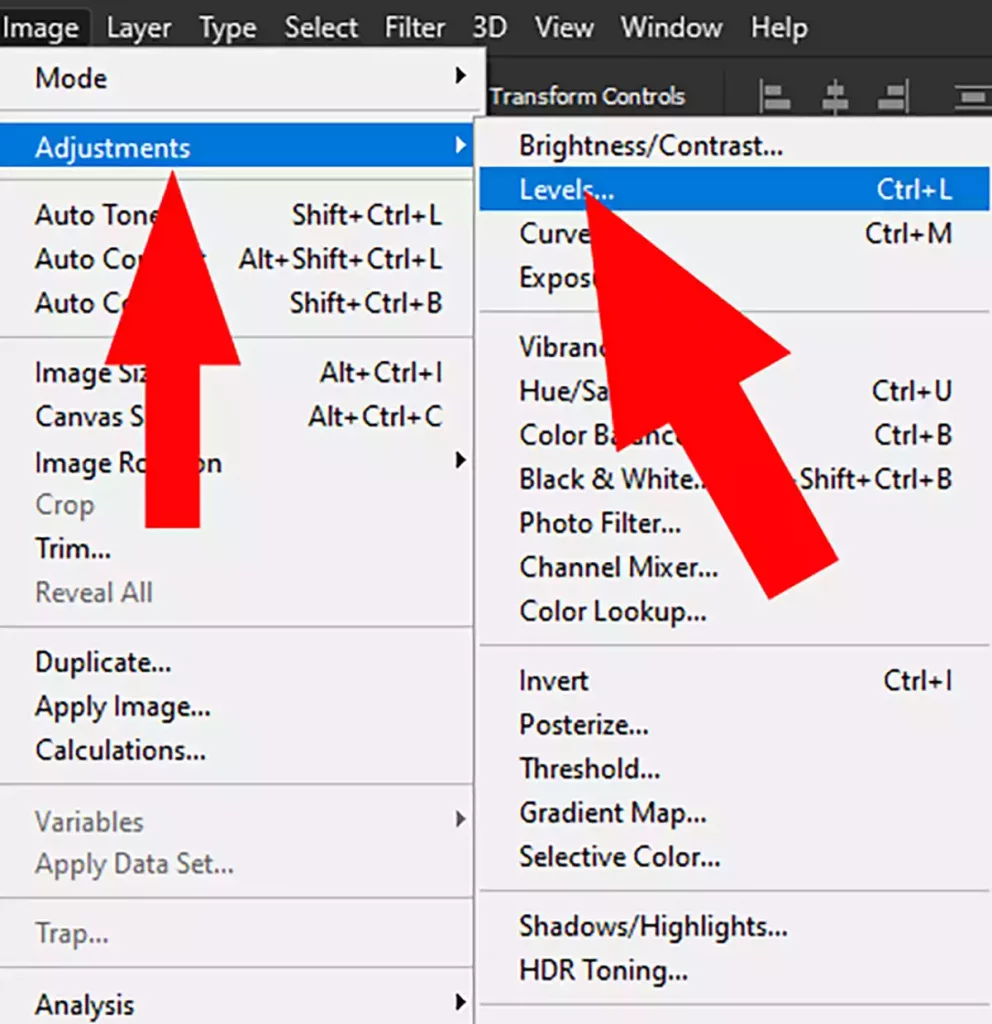
There are two ways to access Levels in Photoshop. The first method is to choose Image > Adjustments > Levels. This option applies the adjustment directly to the selected layer, making it suitable for quick edits. ( Visit Types of Adjustment Layers in Photoshop to read more articles about photo editing. )
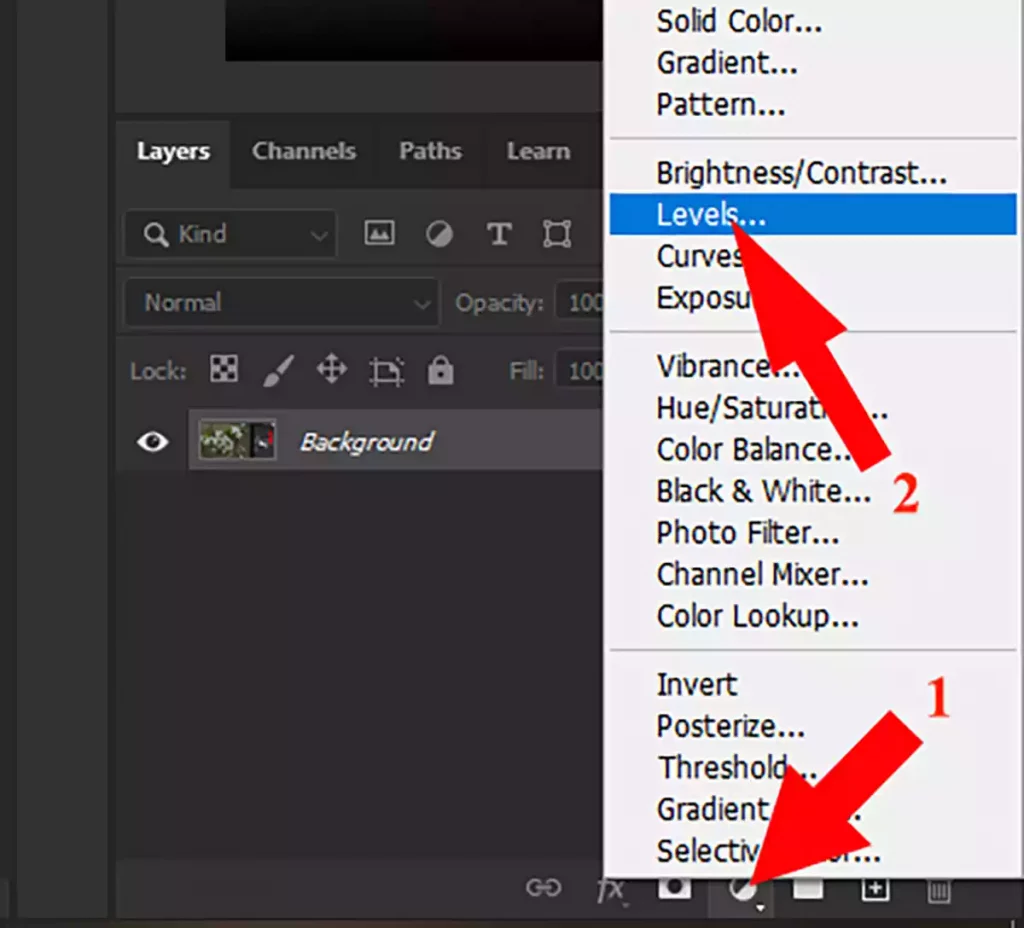
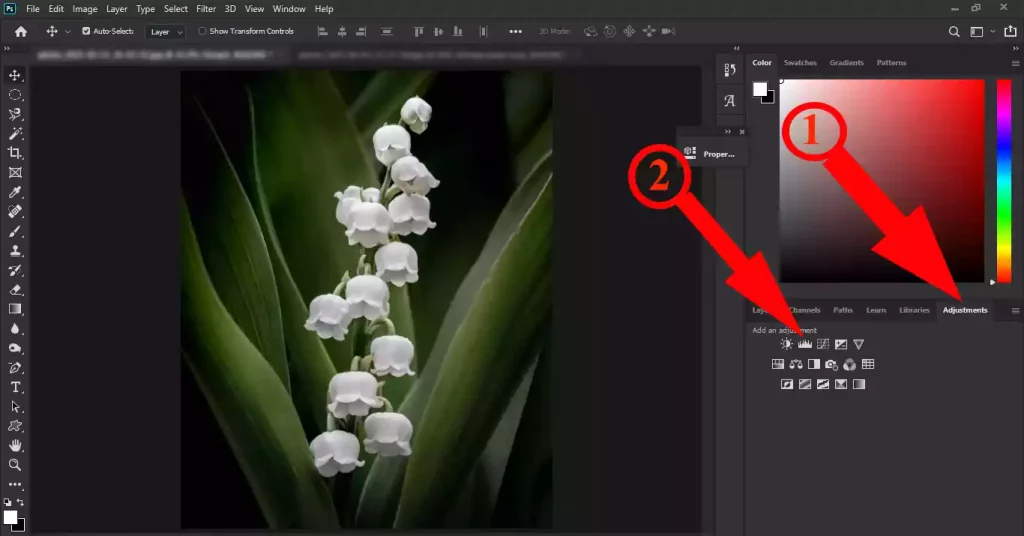
The second method is more flexible. Click the Create New Fill or Adjustment Layer icon at the bottom of the Layers panel and choose Levels. Because the adjustment is added on a separate layer, you can edit or remove it later without affecting the original image.
Understanding the Histogram and Levels Sliders
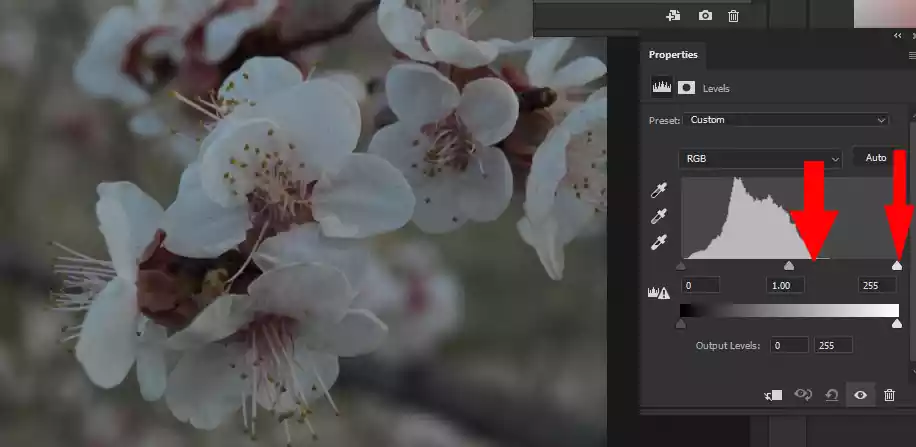
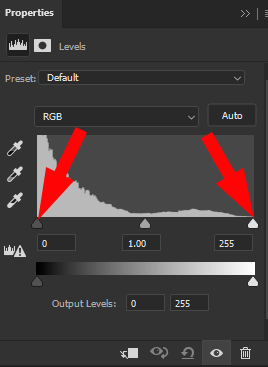
In the image below, you can see the Levels Properties box. A histogram in the center indicates the image’s lighting; below the histogram, there are three sliders on the slider bar.
If the histogram on the right or left does not fill the box, you can move the slider on the same side until it reaches the histogram.
If there is empty space on either side of the histogram, move the corresponding black or white slider until it reaches the beginning of the histogram. This increases tonal range, improves contrast, and often makes colors appear clearer.
( Please look at Open Raw Images to read more about opening images in raw format )
The middle (gray) slider controls the midtones. Instead of changing the darkest or brightest areas, it adjusts the overall brightness of the midtone values, making it useful for fine-tuning exposure.

In most cases, adjusting the RGB channel is enough because it changes the overall brightness and contrast. Advanced users can also edit the Red, Green, or Blue channels separately to correct color casts.
Photoshop also includes an Auto button that automatically adjusts the Levels settings. While it can improve some images, manual adjustments usually produce more accurate and consistent results.
The middle slider starts at a value of 1.00. Moving it to the left brightens the midtones, while moving it to the right darkens them. Unlike the black and white sliders, it mainly affects the middle tonal range rather than the darkest or brightest pixels.

In the image below, there is a space between the histogram and the slider on the left, and the image is slightly darker. In the next step, to adjust levels in Photoshop, correcting the left slider makes the picture more apparent, the colors more prominent, and the useless light spectra are removed.

If there is a case where the histogram fills the entire frame, it is better not to use Levels because the image quality may be damaged. In such cases, you can use other tools.
How to adjust levels in Photoshop on one layer
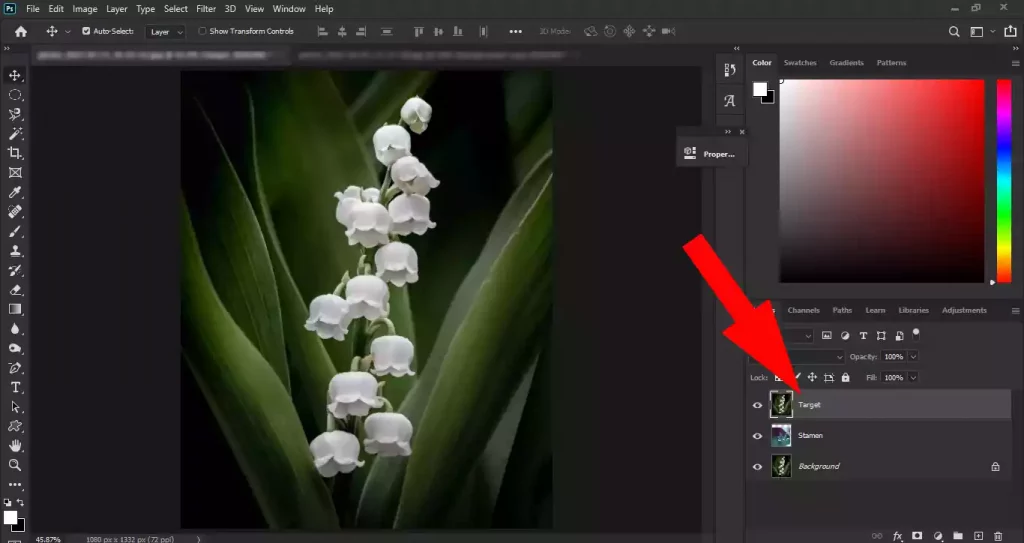
The Levels tool usually affects all of its underlying layers (this is true of all Adjustments layers), but you may want the levels to affect only one layer.
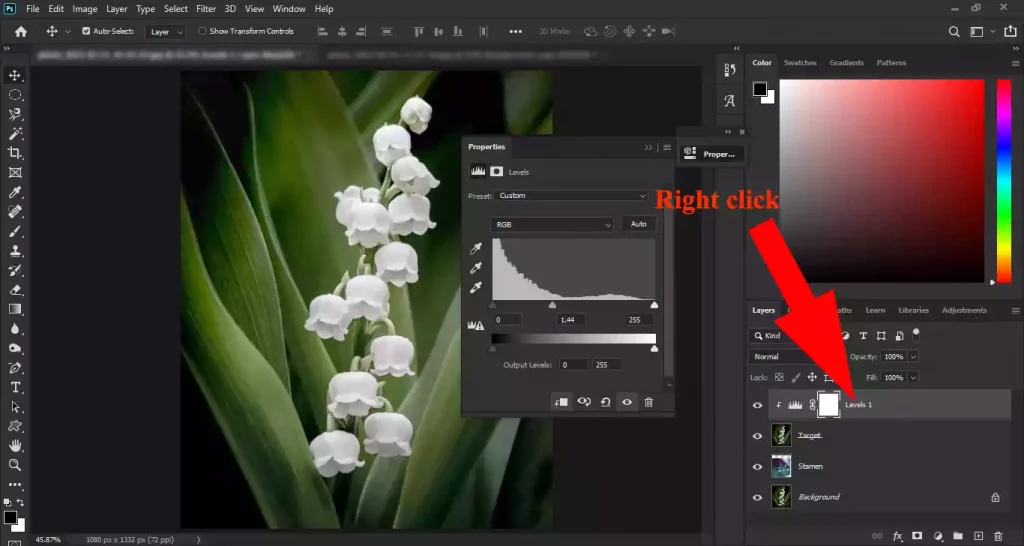
I named that layer the target here. Select the target layer.
From the adjustments panel, click Levels. This new layer of Levels Adjustments has affected all the underlying layers.
You will notice that this new layer of Levels Adjustments has affected all the underlying layers.
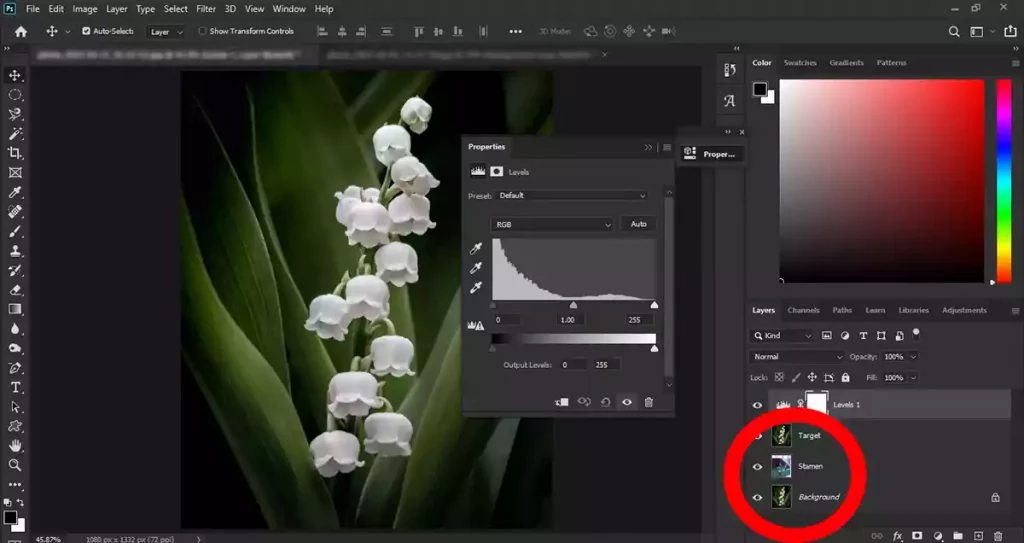
To affect only the target layer, right-click on the Levels layer and select Create clipping mask.
Sources