How to Use the Patch Tool in Photoshop
Practical Retouching Guide
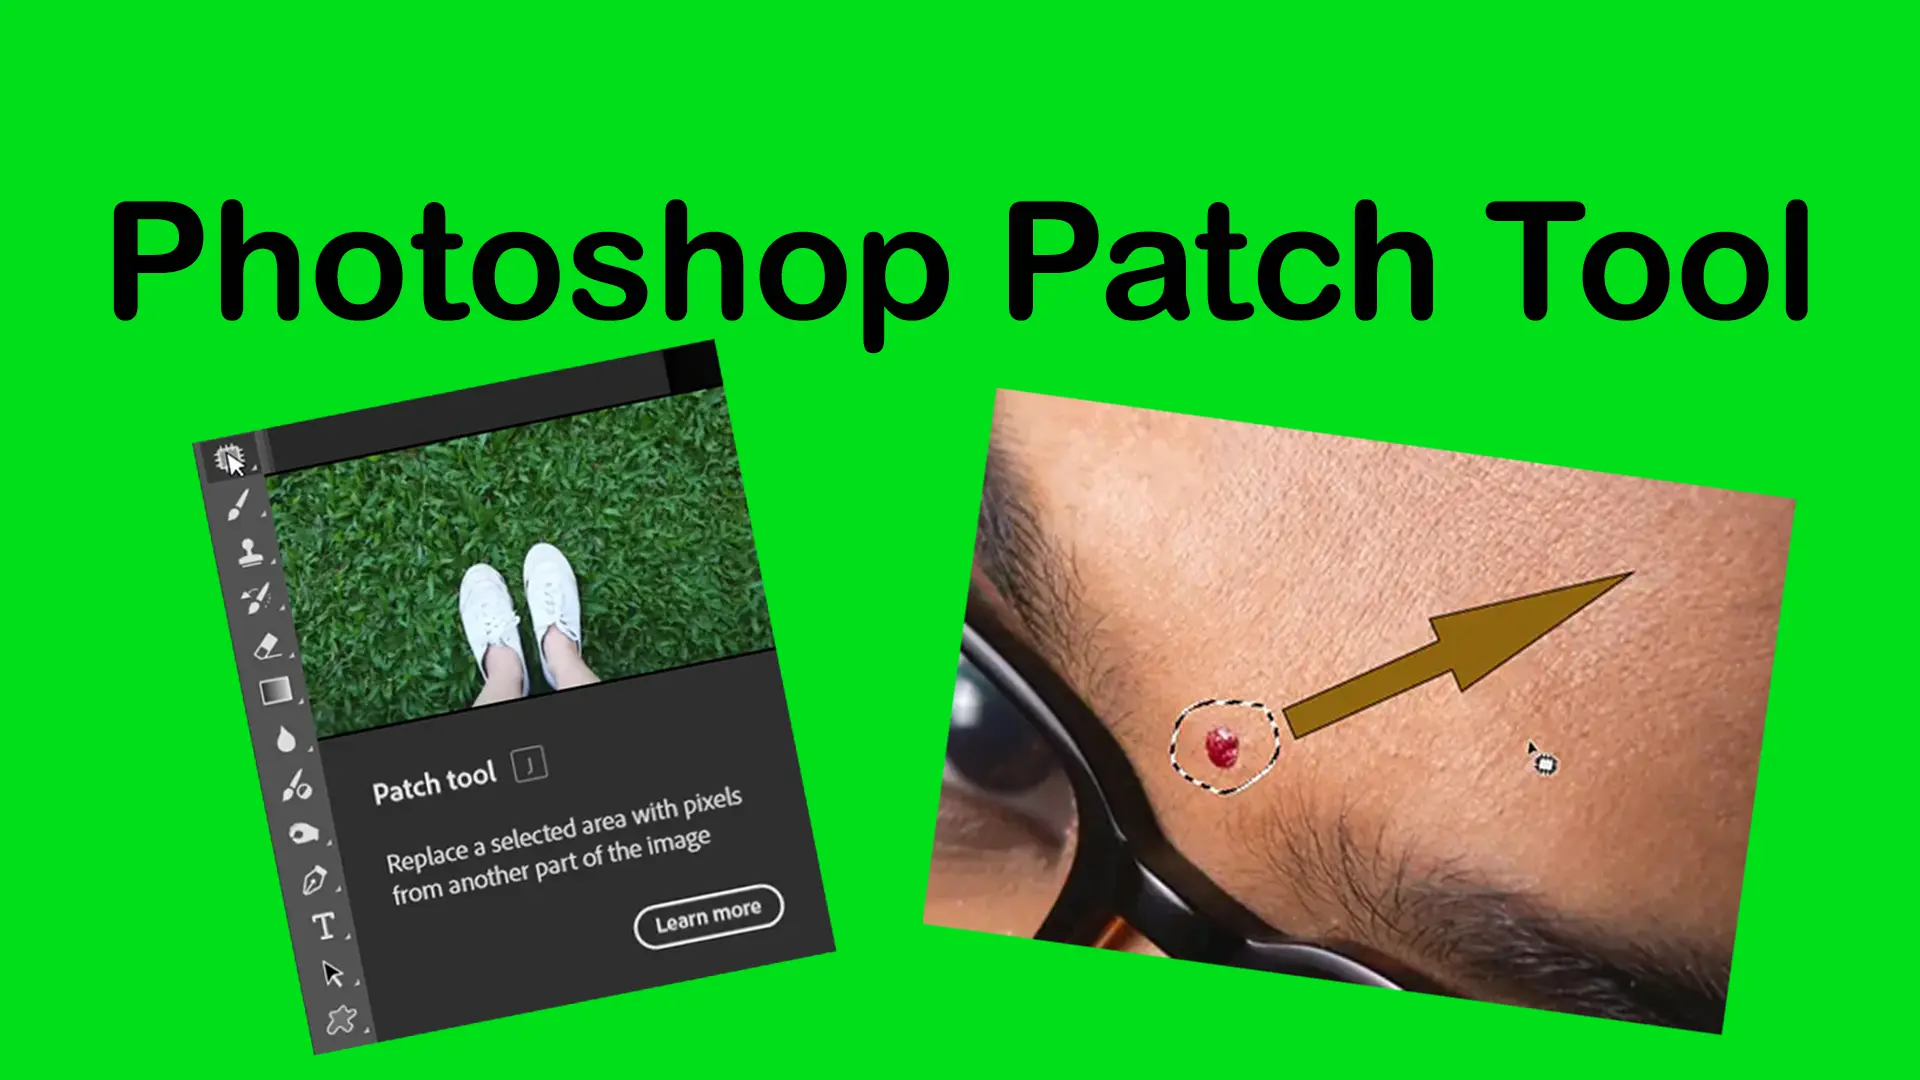
The Patch Tool in Photoshop is designed to repair larger areas of an image while preserving natural texture and lighting. Instead of painting with a brush, you make a selection around the problem area and replace it with texture from another part of the image.
This makes the tool especially useful for portrait retouching, fixing wrinkles, cleaning backgrounds, and repairing damaged areas in photos.
If you are still learning where retouching tools are located and how they work together, you can explore the Photoshop Toolbar and continue practicing with tutorials from the Basic Photoshop Tutorials for Beginners.
For a complete overview of retouching workflows and repair tools, visit the Photoshop Healing Tools.
Topics
What Is the Patch Tool?
The Patch Tool is part of Photoshop’s healing tools group. It allows you to select an unwanted area and replace it using texture sampled from another part of the image.
Unlike clone-based tools, Photoshop automatically blends:

- texture
- lighting
- color
to create a more natural result.
Shortcut group: J
When Should You Use the Patch Tool?
This tool works best when you need to repair areas that are larger than small blemishes.
Ideal for:
A_ Removing wrinkles from clothing
B_ Cleaning uneven skin areas
C_ Repairing damaged textures
D_ Removing medium-sized distractions
Not ideal for:
A_ Tiny imperfections
B_ Detailed edge work
C_ Complex object removal
For smaller corrections, other tools inside the Photoshop Healing Tools may be more efficient.
How to Use the Patch Tool
Select the tool
Choose the tool from the toolbar.
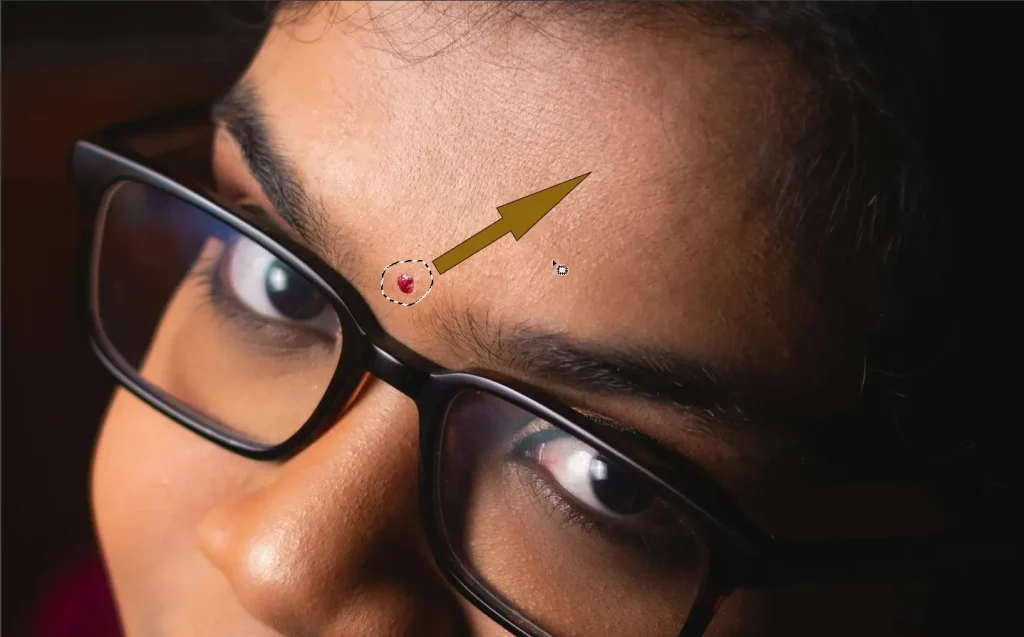
Draw Around the Problem Area
Create a loose selection around the unwanted part of the image.
Drag the Selection
Click inside the selection and drag it to a clean texture area.
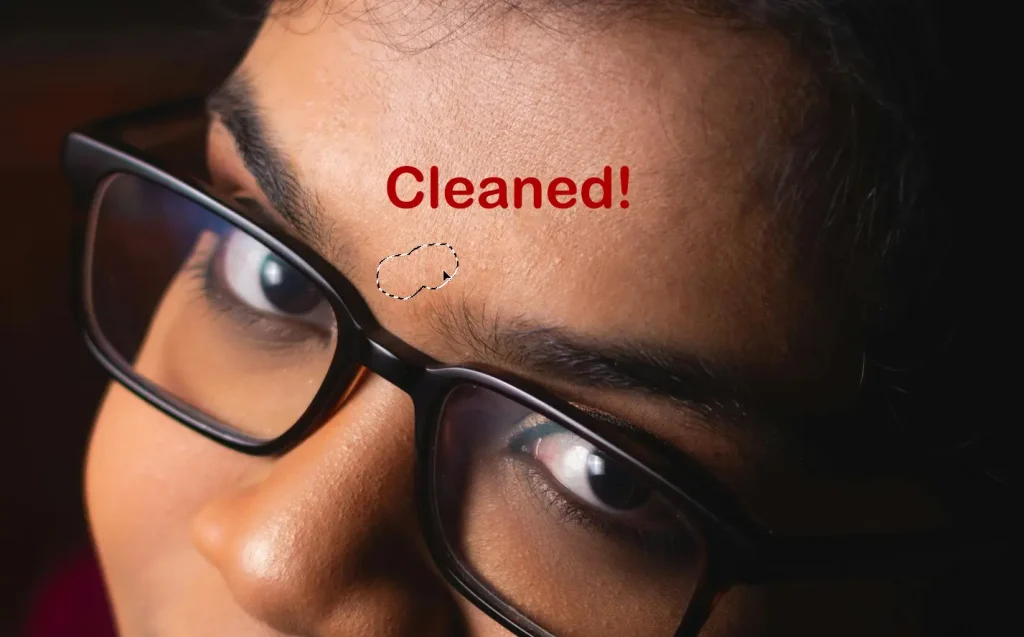
Release the Mouse
Photoshop blends the replacement texture automatically.
Practical Project: Remove Clothing Wrinkles
The goal is to smooth distracting wrinkles on a shirt while preserving fabric texture.
Workflow:
- Open your image
- Select the Patch Tool
- Draw around a wrinkle area
- Drag the selection to a clean nearby fabric area
- Repeat for additional wrinkles
The result is a cleaner clothing texture without obvious editing marks.
This technique is commonly used in portrait and product photography workflows.
Patch Tool vs Healing Brush
Although both tools repair imperfections, they work differently.
- Brush-based workflow
- Better for small details
- Requires manual sampling
Patch Tool
- Selection-based workflow
- Faster for larger areas
- Easier for texture repair
Many professional editors combine both tools in the same retouching workflow.
Common Beginner Mistakes
1. Selecting areas that are too large
Large selections often create blurry or unrealistic blending.
2. Sampling from different lighting areas
Texture may match, but lighting inconsistencies can reveal the edit.
3. Ignoring natural patterns
Repeating textures can make retouching look obvious.
The Patch Tool works best for medium-sized repairs, but Photoshop includes several healing tools designed for different situations. Learn how they compare in the Difference Between Healing Tools in Photoshop.
Pro Tips for Better Results
- Use small-to-medium selections
- Work close to the original texture area
- Zoom in to inspect details
- Combine with Healing Brush for final cleanup
Why the Patch Tool Is Useful
The Patch Tool helps you understand an important concept in Photoshop retouching:
Good editing is not only about removing distractions — it’s about preserving realism.
Because the tool blends texture automatically, it can produce smoother and more natural corrections than simple copy-and-paste editing.
Final Thoughts
The Patch Tool is one of the most practical retouching tools in Photoshop for repairing medium-sized imperfections quickly and naturally. While beginners often overlook it, the tool becomes extremely valuable once you start working on portraits, fashion images, or product photography.
As you continue learning Photoshop, understanding when to use the tool instead of smaller healing tools will make your workflow faster and more professional.
Sources